(Draiv Solregard's Exploration guide is subject to change, based on updated information, new information, expansions, and the apocalypse. If you notice any errors in this guide, wait for your booster side effects to subside. If the error is still there let me know and I'll look into it.)
Looting
This is where you gather all the bacon that is
vomited forth after a successful hacking attempt.
There are five mini-containers in the loot spew:
·
Parts - These more frequently contain valuable
loot and should be the first ones you grab.
·
Materials - These contain other valuable loot
and should be grabbed second.
·
Data - You should only grab these if there is a
blueprint you are trying to nab.
·
Equipment - If you click on this other than by
accident you're bad at scavenging, it does not contain loot.
·
Scrap - If you click on this other than by
accident you're bad at scavenging, it does not contain loot.
Relic Site:
·
Parts - Tech I/II Salvage and Construction
Components
·
Materials - Tech I/II Salvage and Construction
Components
·
Data - Blueprint Copies
Data Site:
·
Parts - Decryptors and Datacores
·
Materials - Pirate [Faction] Materials
·
Data - Blueprint Copies and Skill Books
It will be your job to keep track of prices and to
collect what will be most valuable to you.
The loot spew which will happen after a successful hack
will be really frustrating because it is a twitched based system, you can't get
the mini-containers to show up on your overview, the brackets surrounding the
containers are small making it sometimes hard to click on them, the
mini-containers can move really fast, and they constantly overlap often times
causing you to click a useless container like equipment or scrap.
You have a 3,000 m loot range of the mini-containers and
you should normally only have to click once on the container to activate the
looting process.
The mini-container
bracket colors play a role as well:
·
Green - This means you are not looting and can
click on this container to loot.
·
Yellow - You are currently busy and are unable
to loot another container.
·
White - The container is out of range.

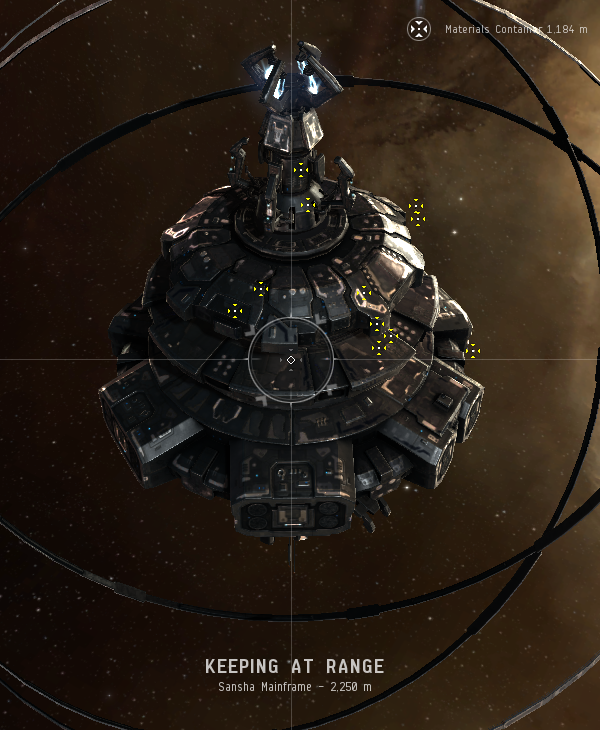
First thing you want to do is change your camera focus
from your ship to the object you want to hack.
This will keep the camera stable and allow a better perspective of all
mini-containers. You also want to set
your "Keep at range" distance to 2,250 m the reason for this is that
it will allow you more time to grab fast moving containers and if you notice
someone warping in on d-scan you can just activate your cloak since you are
more than 2,000 m from an object.
When the mini-containers are launched you will now want
to move your camera to an angle where the containers are not overlapping each
other.

Continue adjusting as needed.

When a container you want drifts out of range you will
need to approach it, but your little ship is agile and quick. So to avoid drifting out of distance of other
containers make sure to stop your ship a little before you get within
range. This will allow your momentum to
bring you within range of the container, but will also most likely keep the
other containers within range.
Tips:
·
Remember to only change camera angles while in
the process of looting a container.
·
While looting a container mouse over the other
containers to find the next one you wish to loot.
·
Keep track of the distance of the
mini-containers, so they don't sneak out of range.
·
Containers will spew forth in waves, loot all
your target containers in the first wave and then loot the others after
that. Containers disappear after a set
time so there is no rush to grab the second or third waves.
·
When presented with two equal options to loot,
always loot the blinky one first because it will probably disappear before the
other one does, giving you the opportunity to get both instead of one.
·
Always cargo scan the object you are going to
hack to find out which mini-containers you want to focus on.
·
Pirate faction materials take up a lot of space,
as does the junk you get when a mini-container doesn't have the loot you're
looking for. Either jettison these into
space or dock up at the nearest station and dump them off.
·
If you get something really valuable dock up and
drop it off, don't continue to run sites with all your eggs in one basket. Return later with the sole purpose of getting
the loot out.
You also want to set your "Keep at range" distance to 2,250 m the reason for this is that it will allow you more time to grab fast moving containers and if you notice someone warping in on d-scan you can just activate your cloak since you are more than 2,000 m from an object.
ReplyDeleteI understand why you use the distance you do: to be able to cloak/evade. Perhaps you have better skills than I do, to be able to keep hitting dscan or just generally see people landing on grid in time to GTFO.
There is a downside, though. Because one cannot grab loot containers that are more than 3000m away, any spew on the far side of the spew container will be out of your range very quickly.
Me, I've been killed often enough while hacking that I don't try to get fancy. Here's how I avoid gank: I never start a hack if there is any other pilot(s) in the same system. I just cloak and wait for them to move on, or I move on myself. This has the disadvantage of giving up loot that I might get sometimes, but it saves me Buzzards and pods, and the time required to re-ship, re-implant, fly back, etc.
Given the above, my advice for where to be relative to the spew container is right next to it, distance no more than a few hundred meters. This keeps you near all the loot containers for much of their lifetime. When the spew happens, try to get the cans you want from the first spew, then rotate around some to get a sense of where the later spew(s) are in 3D, which will be something like an expanding half sphere. Now you cull the ones that are furthest from the center of the half-sphere, and you should move in small bursts towards the center of the half sphere to stay in range of as many of the cans as possible.
The safety section addresses a lot of these and how I'm able to deal with it. Practice really makes the difference and paying extra attention to the windows while hacking. Since hacking requires no attention you should be looking at those windows and watching d-scan.
DeleteOut of all my exploring I've only died once when I was blapped right as I undocked after dropping off a bunch of T2 rig BPC's. I hadn't made a safe undock yet in that system XD. But I got my pod out and returned a few days later to collect the BPC's.
I find losing a ship every now and then more favorable than constantly waiting for an empty system. Of course the areas I explore can have high activity at times.
But it's all a matter of risk vs reward, do I take that risk or do I just let it pass me by? It's based on what you're willing to risk. I normally don't take risks until the ship I'm flying has paid for itself. After which I'll be down right risky and do some exploration in a Faction Warfare system occupied by 40 other pilots and picking up probes on d-scan.
I see the approach you're coming from and why it's useful and it's perfectly valid with your play style. If it works why fix it, right?
But when staying safe it's easier to just stay 2,250 m away and keep an eye on the containers that start to drift near the 3,000 m range.
I have now been killed twice hacking cans, and one other time when I carelessly warped into a bubble-camp in null. One time I was killed (link) it was a stealth bomber firing light missiles. I thought I was safe because I was dscanning for probes and/or ships; it turned out her corpmate had scanned the system 10 minutes before I entered, and evidently she was fit out exactly to kill explorers. I got the pod out.
DeleteThe other time I got killed and podded it was a smartbombing battleship that warped right on top of me. I am not sure how he did that; I was not paying attention though (lot of people in local).
I expect part of the difference is attitude is in where we are exploring from. If you explore based in kspace, then you probably can reship fairly close by even if you get podded.
By contrast I explore from wspace. If I get podded I don't go back to my POS or anywhere near; I have to go somewhere in kspace, so I go to Jita. Getting back to my wspace system then means a potentially long trek. Sometimes I might not get back at all until the next day. On the upside at least reshipping is relatively easy.
The other thing about being based in wspace is that I get a new place to explore in every day. I cannot come to learn the local pilots. But on the other hand, I have witnessed how empty almost all of null is, and a good amount of lowsec. So, I am spoiled.
Yeah, the areas I normally explore tend to be frequented by the same people so learning names matters.
DeleteWhen you were killed by the bomber because it uncloaked (probably on top of you), this is why I recommend using the notes section when you right+click a person to see their info and adding them as a contact with a specific standing; because if they warp in system or are in system that red flag will tell you to check that person out. You'll see from your notes they had attacked you with a cloaked bomber previously, allowing you to judge whether or not to explore the system.
This isn't a perfect solution since it requires you to be shot at first but over time you'll be amazed as your database grows and how helpful it is.
When I end up getting podded, I have 3 more covert ops fitted and ready to go when I wake back up in station. It doesn't quite work like that in WH's :) Basing out of WH space is a completely different ball game. There are a lot of things to keep track of, and dying hurts a whole lot more than when you base out of k-space.